

Are you looking to clone your hard disk to an SSD in Windows 10? This process can be a little daunting for some, but fear not! We’re here to show you how easy it can be. In this blog post, we’ll walk you through the steps necessary to clone your hard disk to an SSD in Windows 10. So read on and then follow along with us as we guide you through the process. Cloning a SSD on windows 10 laptop is very simple if done correctly.
If you have been using a laptop with a traditional spinning hard drive (HDD) for a while now and are thinking of making the switch to a solid-state drive (SSD), then this the guide for you.
Clone your hard drive to an SSD in Windows 10 laptop
1. Download the EaseUS Todo trial version. To download the programme, you must first enter your email address.
2. To install the application on your computer, follow the on-screen directions.
3. Connect your SSD to your PC. You may need to clone your SSD using a USB-to-SATA converter or an external dock if your laptop supports only one hard drive port. When the process is finished, you may then insert your SSD.
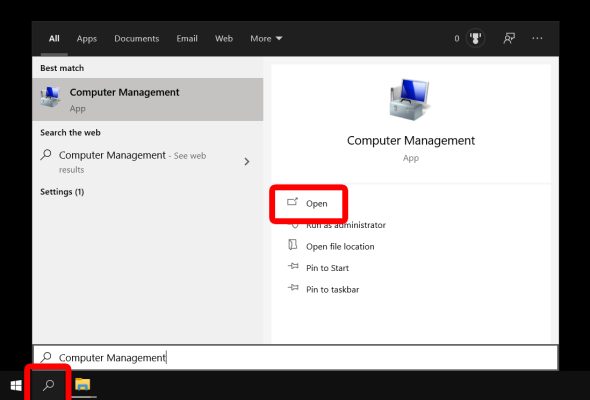
4. In the bottom-left corner of your screen, click the magnifying glass icon and type “Computer Management” into the search box.
5. Open it
6. Wait for the signal and start the SSD initialisation process in the Computer Management window. If you are not requested to initialise your disc, you may do it by right-clicking on it and selecting Initialize Disk from the context menu. You can identify which disc is your source and which is your new SSD by looking at their sizes.

7. Choose a partition that is identical to the one on your source drive. You can find it by right-clicking on your source drive and selecting properties. Then go to the Volumes tab and look for your partition style. There are two partitions GUID Partition Table (GPT) or Master Boot Record (MBR). Then, for your SSD, select the same partition style.

8. Click Ok
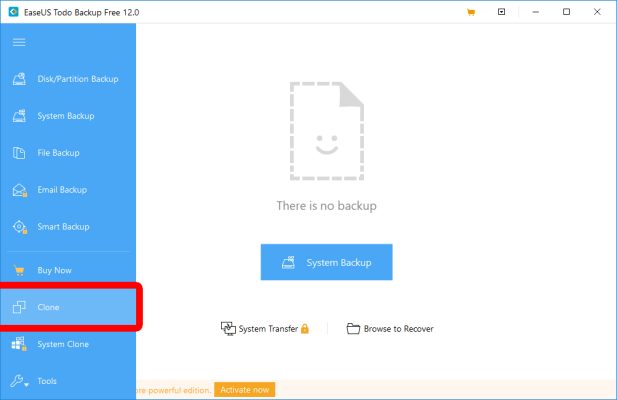
9. Open EaseUS Todo
10. Access the left side bar and click the clone option
11. Select the hard disk you want to clone

12. Select your target SSD
13. Click Advanced Options> Optimize for SSD

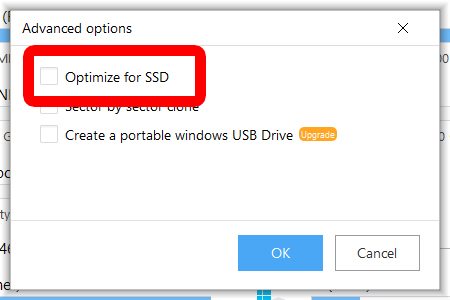
14. Click OK and proceed
15. Wait for the process to be completed
16. Click Finish after it is completed
How To Boot The SSD You’ve Cloned
After you’ve created a clone of your hard drive, you may use your laptop by booting from the SSD. After you’ve cloned your hard disc, follow these instructions to boot from SSD.
1. Place the SSD in your laptop- If you used an external SDD for the cloning, you must first plug it into the laptop before you can boot from it. You can skip this step if you were able to clone with the SSD already installed in your machine.
2. Restart your laptop and access your BIOS setting. You may check your startup screen or seek for your BIOS key online.
3. Navigate to the boot section

4. Move the cloned SSD to the top of the list- By listing your SSD to the top of the list tells your laptop to boot that specific drive first.
5. Save and Exit the BIOS menu
6. Restart the laptop
7. Click on ‘This PC’ from the desktop or start menu
8. Confirm the cloned SSD as your C drive. You can do so by looking at its size.

How to Clone SSD on Mac OS
If you have a Mac OS or a MacBook you can use Disk Utility to clone your hard drive. It Mac OS the process is referred to as ‘Restore’ and not ‘clone’ since it is recovering data from one disk to another.
1. Connect the SSD to your MacBook
2. Access the Apple Recovery Menu by holding down the Command + R keys. This will restart your Mac

3. Release the keys once the Apple logo appears
![]()
4. Click Disk Utility once the Mac boots up

5. In the left sidebar choose your SSD
6. Click Restore
7. Choose the drive you want to clone from the menu- To copy all the files and data, ensure that you select the hard drive and not the Base System
8. Wait for the process to be completed
9. Click Done after completion
How to Boot the Cloned SSD on Mac OS
1. Switch on your MacBook
2. Hold down the Option key while in the process of restarting
3. Select SSD from the Boot Switcher menu
4. Finish the boot up.
Cloning a hard disk to an SSD is one of the best ways to improve performance on your laptop or MacBook. If you’re looking to make your computer run faster, this is the solution for you. Make sure you follow these steps carefully and clone your entire hard drive – not just part of it. By doing so, you can enjoy all the benefits that come with using an SSD as your primary storage device. Have you tried cloning your hard drive to an SSD? What was your experience? Let us know in the comments below.