

Lenovo IdeaPad Flex 5 Charging Port Replacement Service
Is your Lenovo IdeaPad Flex 5 refusing to charge? Do you find yourself wiggling the power cable to get a connection, or does the charging light flicker annoyingly? This is an extremely common problem for an otherwise fantastic laptop. Don’t worry—StarLabs in Singapore has an expert, fast, and affordable solution.
While you’re here to solve your Flex 5’s power issue, let’s explore why this happens and what your best options are.
The Lenovo 2-in-1 World: The IdeaPad Flex 5
Lenovo dominates the laptop market with several famous lineups, each built for a different user:
- ThinkPad Series: The legendary black business laptops, known worldwide for their rugged build and industry-leading keyboards.
- Yoga Series: The premium 2-in-1s, offering slim, metallic designs and high-end features for maximum portability.
- IdeaPad Flex Series: This is where your IdeaPad Flex 5 shines. It hits the perfect sweet spot of performance, flexibility, and value. It’s the versatile workhorse for students, home users, and professionals who want a laptop and tablet in one, without the premium Yoga price tag.
- Legion Series: Lenovo’s gaming powerhouse, packed with powerful graphics, advanced cooling, and high-refresh-rate screens for gamers.
Common Issues for IdeaPad Flex 5 Owners
Even reliable laptops like the Flex 5 can develop specific problems over years of use. At StarLabs, we commonly see Flex 5 models come in for:
- Broken or weak hinges from frequent “flexing”.
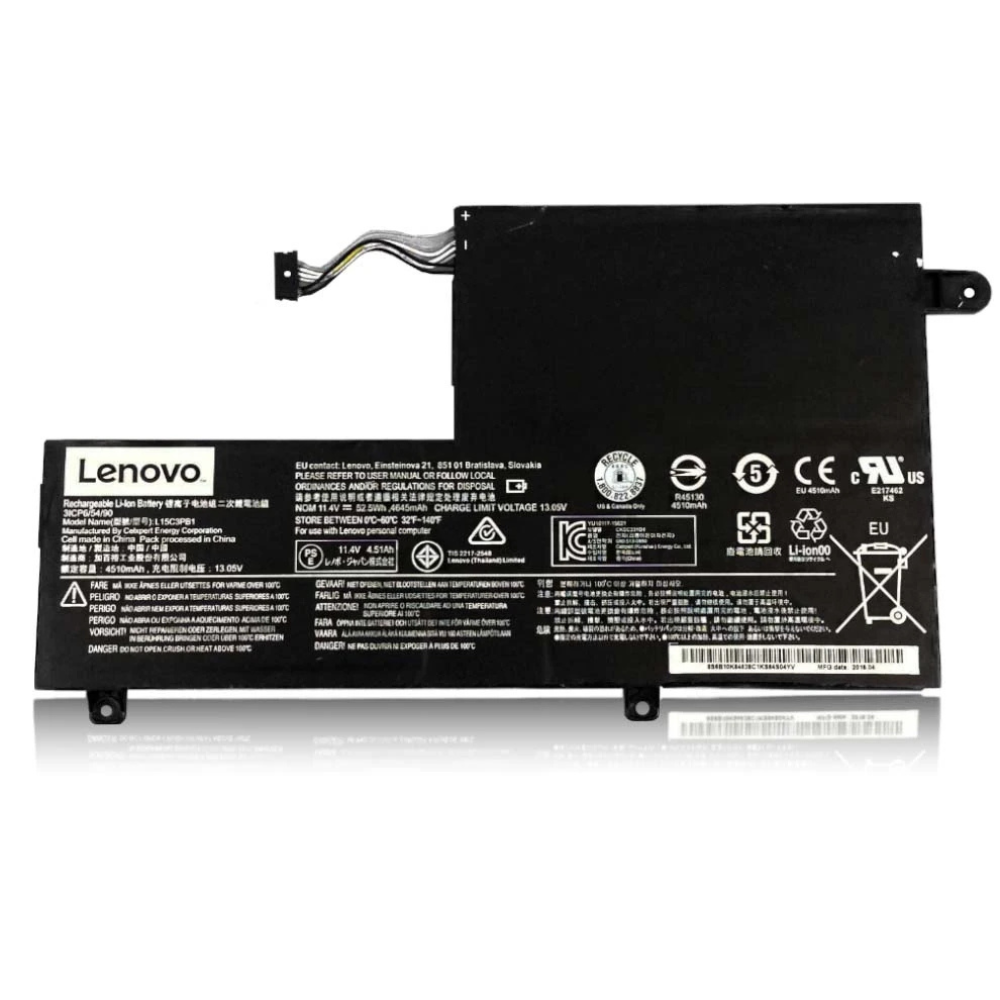
- Battery degradation (not holding a charge).
- Cracked touchscreens or display issues.
- Overheating or loud fan noise.
- And the most common: Charging Port Failure.
The Core Problem: Why Your Flex 5 Charging Port Fails
The charging port on your Lenovo IdeaPad Flex 5 is a high-traffic area. It gets plugged, unplugged, bumped, and pulled every single day. This constant physical stress eventually causes the port to fail.
Signs of a broken charging port:
- You have to hold the charger plug at a specific angle.
- The connection feels loose, wobbly, or “spongy”.
- The laptop switches rapidly between charging and battery.
- The charging LED doesn’t light up unless you push the cable.
- You’ve tried a new charger, and it still doesn’t work.
The Expensive Trap: The good news is that on most IdeaPad Flex 5 models, the charging port (or “DC-in jack”) is a separate part connected by a small cable. The bad news? Many official service centres won’t bother replacing just this small part. They will quote you for an entire motherboard replacement, a repair that can cost hundreds of dollars—often approaching the price of a new laptop. This is unnecessary and expensive.
DIY Laptop Charging Port Replacement
StarLabs – Singapore’s home of DIY spare parts
For the brave and technically skilled, replacing the cabled port on a Flex 5 is possible. It requires patience and a steady hand.
Tools & prep
- Torx T5 & Phillips #0 screwdrivers
- Plastic spudger or opening tool
- Replacement IdeaPad Flex 5 charging port (grab it at StarLabs)
- Small bowl for screws
- Soft towel
STEP 1 – Power-down & pad-up
Fully shut down Windows. Unplug the charger and any other cables. Close the lid and lay your Flex 5 upside-down on a soft towel to prevent scratches. Press and hold the power button for 5 seconds to discharge any remaining electricity.
Pro tip: Take a photo of the screw layout on your phone. On many Flex models, some screws (usually near the hinges) are longer than others. Mixing them up can damage the case.
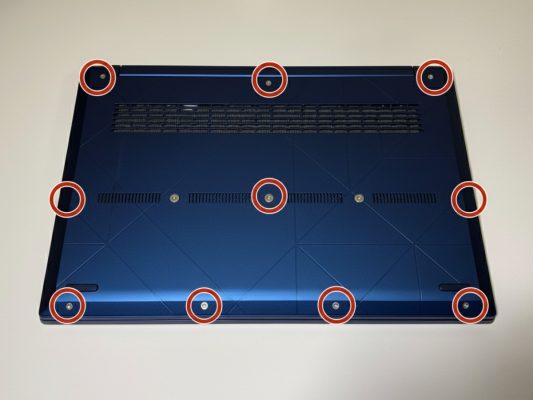
STEP 2 – Release the bottom cover
Undo all the Torx or Phillips screws holding the bottom cover. Place them safely in your bowl. Start at the rear seam (near the hinges) and gently slide a plastic spudger between the cover and the main chassis. Twist gently to “pop” the clips. Work your way around the entire laptop until the cover lifts off easily.
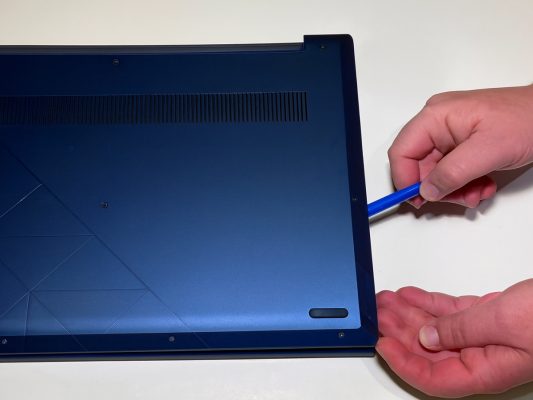
! Warning: Never force it. If it feels stuck, re-check for a missed screw. Lift the cover off slowly; tiny speaker or ribbon cables may still be attached.
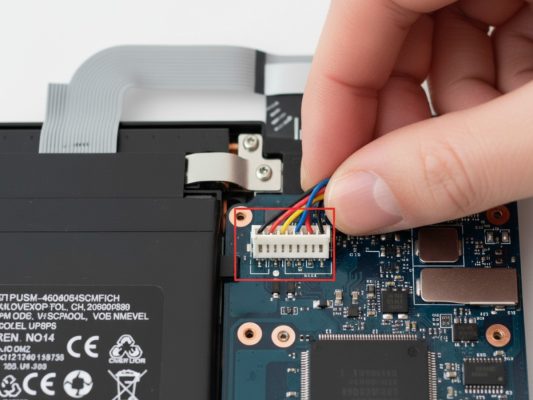
STEP 3 – Kill all power by unplugging the battery
This is the most important step. Locate the main battery connector on the motherboard. It’s usually a white or black plug with multiple wires. Grip the plastic plug (never the wires) and pull it straight out, parallel to the board. It should unplug with a smooth tug.
Why this matters: Working inside a laptop with the battery connected is how you cause a short circuit. This step prevents you from turning a simple port repair into a complex motherboard repair.
STEP 4 – Swing the hinge bracket out of the way
On many Flex 5 models, the charging port is tucked under the right-side screen hinge. Remove the screws (usually Phillips-head) securing this metal hinge bracket to the chassis. Carefully pivot the entire hinge bracket upwards, like a door, to reveal the charging port and its cable underneath.
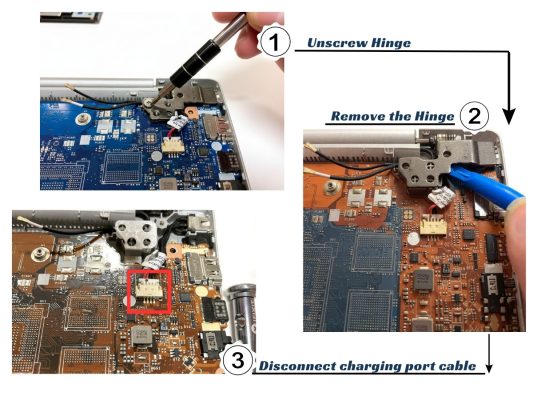
Pro tip: If the hinge feels tight, don’t force it. You may need to loosen (but not remove) nearby screws to release tension.
STEP 5 – Out with the old charging jack
Now it’s simple. Unplug the small white connector at the end of the port’s cable from its socket on the motherboard. Then, simply lift the old charging port assembly straight up and out of its cutout in the laptop’s frame.
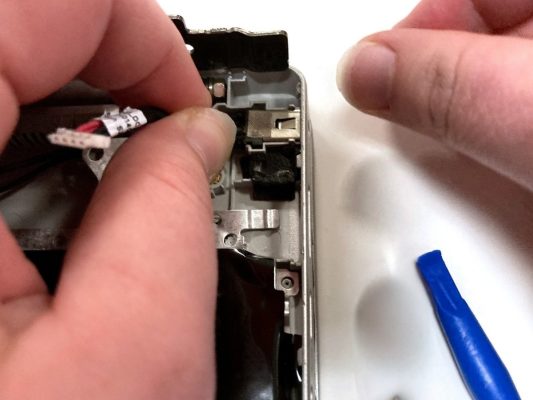
Slot the new charging port into the same cutout. Make sure it sits flush and level. Re-connect its cable to the motherboard socket—it should click firmly into place.
STEP 6 – Rebuild in reverse
Now, just follow your steps backward. Lower the hinge bracket and replace its screws. Reconnect the main battery cable (push it in until it’s fully seated). Snap the bottom cover back on, starting from one edge. Finally, reinstall all the bottom screws, making sure the longer ones go back to their original holes near the hinges.
Give every screw a gentle final tighten. Snug is good; overtightening can crack the plastic.
STEP 7 – The 10-second victory test
This is the moment of truth. Plug in your charger. The charging LED should light up instantly (amber or white) and stay solid. Power on your Flex 5. Once in Windows, wiggle the plug gently. If the charging icon stays solid and doesn’t flicker, congratulations! You’ve successfully repaired your laptop.
If it’s still loose, open it up again. The most likely issue is that the new port isn’t seated perfectly flush in its plastic bracket.
StarLabs Repair: The Smarter, Affordable Solution
Worried about doing the DIY? Don’t risk your laptop. We do this every day.
While a DIY repair is possible, it’s also easy to lose a tiny screw, snap a plastic clip, or (worst of all) forget to unplug the battery and short the motherboard. At StarLabs, our expert technicians can perform this exact Lenovo IdeaPad Flex 5 charging port replacement quickly and safely.
We replace only the broken part, saving you hundreds of dollars compared to a “full motherboard replacement” from an official centre. It’s the fastest, safest, and most affordable way to get your Flex 5 working like new.
Why Choose StarLabs for Your Laptop & Phone Repair?
We are your one-stop-shop in Singapore for all your device repair needs.
- Free Diagnosis: Not sure what’s wrong? Bring your device in for a 100% free, no-obligation diagnosis. We’ll tell you the exact problem and the cost to fix it.
- One-Day Repairs: We stock parts for most common issues. For repairs like charging port replacement, battery replacement, and screen replacement, we can often have your laptop back to you within one day.
- 6-Month Repair Warranty: We confidently stand by our work. All our repairs are covered by a 6-month warranty on the parts we’ve replaced and the service performed.
- We Fix Everything: Our expertise doesn’t stop at charging ports. We are specialists in all laptop and phone repairs, including:
- Motherboard Repair (Component Level)
- Water Damage Cleaning & Repair
- Fan Replacement & Overheating Issues
- Software Problems & Virus Removal
- Keyboard & Trackpad Replacement
- Screen & Hinge Repair
- …and all phone repairs!
Stop wiggling that cable!
Get your Lenovo IdeaPad Flex 5 charging like new again. Contact StarLabs today to get a quote, or simply walk in for your free diagnosis.